Introduction to scripting
1. Setting up your scripting environment
Scripting offers a more powerful way to interact with OghmaNano. Rather than using the graphical user interface, you can use your favourite programming language to interact with OghmaNano. This gives you the option to drive simulations in a far more powerful way than can be done using the graphical interface alone. Below I give examples of using MATLAB and python to drive OghmaNano, but you can use any language you want which has a json reader/writer. Pearl and Java are two languages which spring to mind.
Before you begin scripting OghmaNano you need to tell windows where OghmaNano is installed, the default OghmaNano will be installed to C:\Program files x86 \OghmaNano, in there you will see in this directory there are two windows executables, one called oghma.exe, this is the graphical user interface, and a second .exe, called oghma_core.exe. You can run oghma_core.exe from the command line without oghma.exe. You simply need to navigate to a directory containing a sim.oghma folder and call oghma_core.exe, this can be done from the windows command line, matlab, python or any other scripting language. However, before you can do this on windows, you need to add C:\Program files x86 \OghmaNano to your windows path so that windows knows where OghmaNano is installed. An example of how to do this on a modern version of windows is given in the link https://docs.microsoft.com/en-us/previous-versions/office/developer/sharepoint-2010/ee537574(v=office.14)
Every new version of windows seems to move the configuration options around, so you may have to find instructions for your version of windows.
2. More tips on scripting
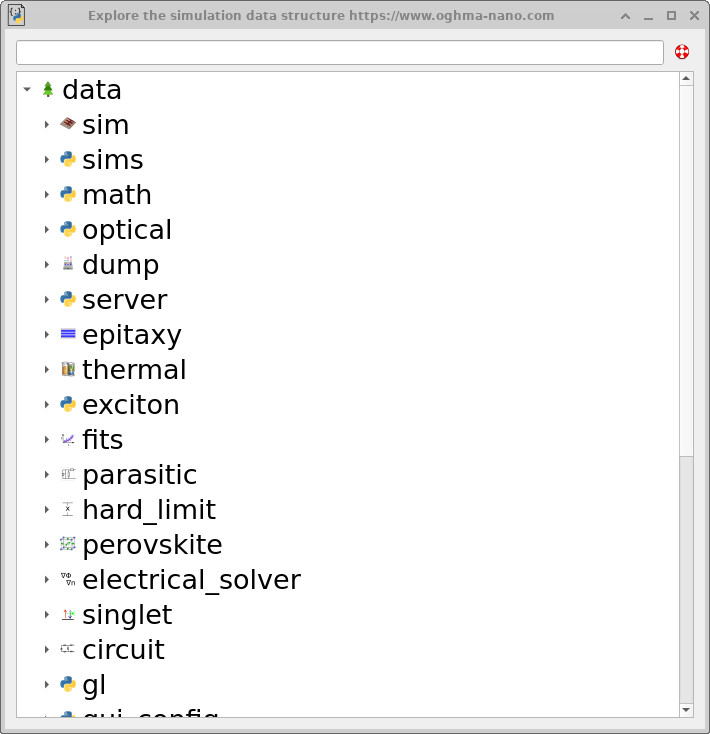
sim.json data structure as a navigable tree.
Think of the GUI as a structured JSON viewer
A useful mental model when scripting OghmaNano is to treat the entire GUI as a
structured viewer and editor for the underlying sim.json file.
Every widget, slider, table, and dialog ultimately reads from and writes to this file.
There is no separate “GUI state” - the JSON is the state. In the Automation ribbon, the JSON Explorer (Figure
??)
allows you to browse the sim.json file directly as a hierarchical tree. This is often the
fastest way to understand where a parameter “lives” in the JSON, and to confirm that a GUI action
is writing to the field you expect.
Inspecting objects via copy-and-paste
Another useful technique is to take advantage of how copy-and-paste works throughout the GUI. When you copy an object - for example, by right-clicking and copying a layer in the layer editor, or copying a selected object in the 3D view - OghmaNano can place the underlying JSON structure responsible for generating that object directly onto the clipboard.
If you paste this clipboard content into a plain text editor (Notepad, Notepad++, VS Code, etc.), you can inspect the exact JSON block used to define that object or table entry. This provides a direct and unambiguous view of how the object is represented internally, and is often the quickest route to identifying the relevant keys for scripting.
Many context menus also expose options such as Copy JSON, Copy JSON path, or Copy scripted path. These commands reveal the exact location of an object within the JSON hierarchy, making it much easier to locate and modify the corresponding entry in scripts.
If you are really stuck: use a diff tool
If you are ever unsure how a particular GUI control maps onto the sim.json file, a simple and
effective debugging technique is to use a file comparison (diff) tool.
- Make a backup copy of your simulation file, e.g.
sim.json→sim.back. - Change a single parameter in the GUI.
-
Compare the modified
sim.jsonfile with your backup using a diff tool such as KDiff3. - The diff output will show you exactly which line (or block) in the JSON changed, revealing how that GUI control is represented internally.
This is often the fastest way to map a UI control onto a specific JSON field, especially in large parameter trees.
Using object IDs to locate entries in sim.json
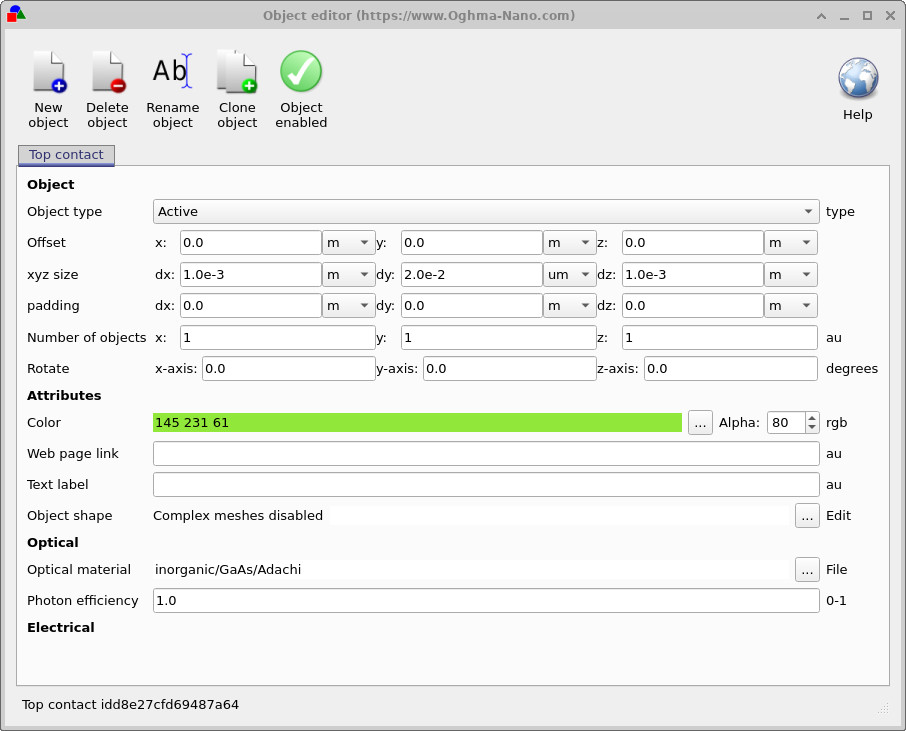
Most structured objects in OghmaNano - such as layers, shapes, parameter scans, and other hierarchical entities - are assigned a unique identifier (ID), typically a random hexadecimal string of approximately 16 characters.
The object ID is often exposed directly in the GUI. For example, in
Figure ??,
the ID is shown in the bottom-left corner of the object editor window. This same identifier
also appears in the corresponding entry within the sim.json file.
These IDs are extremely useful when navigating large or deeply nested JSON structures.
By searching for the ID string in sim.json, you can immediately locate the exact
object associated with a given GUI element, even when the surrounding hierarchy is complex.